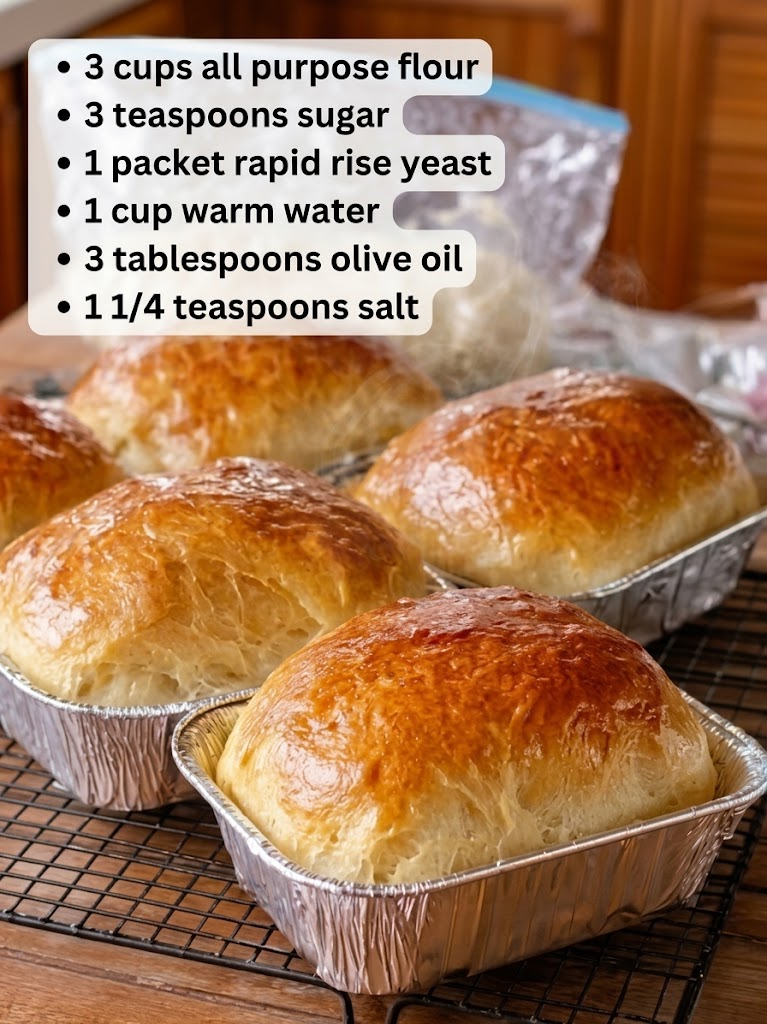
- Bread in a Bag is a fun, beginner-friendly way to make soft, warm homemade bread with minimal cleanup. The dough is mixed and kneaded right inside a food-safe bag, then shaped and baked until beautifully golden on the outside with a tender, fluffy center.It’s an especially appealing recipe for families, beginners, and anyone who enjoys fresh bread without a complicated process. With protein-rich milk and an optional Greek-yogurt addition, this homemade bread can also fit naturally into a high-protein lifestyle while remaining customizable for different dietary preferences.Can This Bread in a Bag Support Weight Loss Goals?Bread in a Bag can fit into a weight-conscious eating pattern when enjoyed in appropriate portions and balanced with protein, vegetables, and other nutrient-dense foods.Using milk and optional Greek yogurt adds protein to the recipe, which can make the bread more satisfying than a recipe based only on flour, water, and yeast. However, bread is still a carbohydrate-rich food, so portion size and your overall daily eating pattern matter.Does Bread in a Bag Fit a High-Protein Lifestyle?Yes, especially when prepared with milk and Greek yogurt for an extra protein boost.
The main ingredients are flour, milk, Greek yogurt, yeast, and a small amount of oil, creating a soft and satisfying loaf.
Its net carbs remain relatively high because traditional wheat flour is the primary ingredient.
For a higher-protein serving, pair a slice with eggs, cottage cheese, Greek yogurt, turkey, or another lean protein source.Why This Recipe Is Special- Beginner-friendly: The dough is mixed and kneaded directly in a bag.
- Minimal cleanup: Fewer bowls and utensils mean less washing afterward.
- Soft and fluffy: Milk and Greek yogurt help create a tender crumb.
- Protein-conscious: Greek yogurt and milk add protein to the homemade loaf.
- Comforting and versatile: Perfect for toast, sandwiches, breakfast, or a warm snack.
- The bag method makes bread feel much less intimidating.
Mixing everything inside the bag keeps the process simple and makes homemade bread approachable for beginners. - I especially like how little cleanup is involved.
Instead of covering the kitchen with flour and using several mixing bowls, most of the messy work stays inside the bag. - The finished loaf has a wonderfully soft center.
The milk and Greek yogurt give the bread a tender texture that works beautifully for toast and sandwiches. - Fresh slices are especially comforting when the bread is still slightly warm.
A little butter, cheese, or a protein-rich topping turns a simple slice into a satisfying snack or breakfast. - It’s easy to make the recipe your own.
Herbs, seeds, garlic, or a little grated cheese can transform the basic loaf without changing the simple preparation method.
- No complicated kneading technique.
The bag does most of the messy mixing and kneading work, making the recipe approachable for first-time bread makers. - Soft, homemade texture.
Milk and Greek yogurt help produce a tender crumb that is delicious fresh or toasted. - Perfect for sandwiches.
The loaf has enough structure to hold eggs, chicken, turkey, cheese, or other favorite sandwich fillings. - Great family activity.
Kids can help shake, mix, and knead the bag under supervision, turning bread-making into a fun kitchen project. - Easy to customize.
Add herbs, seeds, garlic, or cheese to create different flavors from the same basic dough.
- Using water or milk that is too hot: Excessive heat can damage the yeast and prevent the dough from rising properly.
- Adding too much flour: A very dry dough can produce dense bread; the finished dough should feel soft and slightly tacky.
- Sealing the bag completely during fermentation: Gas produced by the yeast needs room to escape, so don’t tightly seal the bag while the dough is rising.
- Cutting the bread immediately after baking: Let the loaf cool before slicing so the interior can finish setting and retain its structure.
- Large food-safe resealable bag — allows you to mix and knead the dough with minimal cleanup.
- 9 × 5-inch loaf pan — gives the dough a consistent shape during baking.
- Measuring cups and spoons — help maintain accurate ingredient ratios.
- Kitchen thermometer — makes it easier to check whether the milk is yeast-friendly.
- Cooling rack — allows air to circulate around the loaf and prevents a soggy bottom.
- Pastry brush — makes applying the optional milk or egg wash quick and even.
- Preparation Time: 15 minutes
- First Rise: 60–75 minutes
- Second Rise: 30–40 minutes
- Cooking Time: 30–35 minutes
- Total Time: Approximately 2 hours 30 minutes
- Servings: 12 slices
- Best Season: All-season
- Total Calories: Approximately 150 calories per serving
Milk and Greek yogurt add tenderness and a protein-conscious twist to the classic loaf.
It’s perfect for sandwiches, toast, breakfast, and easy high-protein pairings.📝 Ingredients- 3 cups (360 g) all-purpose flour
- 2¼ teaspoons (1 packet) active dry yeast
- 2 tablespoons granulated sugar
- 1 teaspoon salt
- ¾ cup (180 ml) warm milk — approximately 105–110°F (40–43°C)
- ½ cup (120 g) plain Greek yogurt — preferably unsweetened
- 1 tablespoon olive oil or avocado oil
- 1 large egg — optional, for brushing the top
- 1 tablespoon milk — optional, for brushing the top
- Activate the yeast.
In a small bowl, combine the warm milk, sugar, and yeast. Let it stand for 5–10 minutes until lightly foamy. This visual cue indicates that the yeast is active. - Combine the dry ingredients.
Add the flour and salt to a large food-safe resealable bag. Shake gently to distribute the ingredients evenly. - Add the wet ingredients.
Pour in the yeast mixture, Greek yogurt, and oil. Seal the bag loosely enough to allow some expansion and carefully squeeze and mix the ingredients together. - Knead inside the bag.
On a clean counter, knead the dough through the bag for approximately 5–7 minutes. The dough should become smooth, soft, and slightly tacky rather than stiff. - Let the dough rise.
Place the bag in a warm, draft-free area for 60–75 minutes, or until the dough has approximately doubled in size. Don’t tightly seal the bag during this stage. - Shape the loaf.
Lightly grease a 9 × 5-inch loaf pan. Remove the dough from the bag, gently press out excess air, shape it into a loaf, and place it seam-side down in the pan. - Allow the second rise.
Cover loosely and let the dough rise for another 30–40 minutes. It should become visibly puffy and rise close to the top of the pan. - Preheat the oven.
During the final rise, preheat the oven to 375°F (190°C). - Add the optional topping.
For a shiny golden crust, lightly brush the top with beaten egg or milk. You can also sprinkle sesame seeds, oats, or herbs over the surface. - Bake the bread.
Bake at 375°F (190°C) for 30–35 minutes, until the top is deep golden brown and the loaf sounds hollow when gently tapped. - Check for doneness.
For the most reliable result, the center should reach approximately 190–200°F (88–93°C). The loaf should feel firm but not hard. - Cool before slicing.
Remove the bread from the pan and cool on a rack for at least 30–60 minutes. Cutting too early can compress the soft interior. - High-protein cooking tip:
For a more protein-focused serving, use the bread as a base for eggs, cottage cheese, Greek yogurt spread, turkey, chicken, tuna, or other protein-rich toppings.
- Calories: ~150 kcal
- Fat: ~3 g
- Cholesterol: ~5 mg
- Sodium: ~210 mg
- Potassium: ~75 mg
- Total Carbohydrates: ~26 g
- Fiber: ~1 g
- Net Carbs: ~25 g
- Sugars: ~2 g
- Protein: ~5 g
- Calcium: ~45 mg
- Storage: Keep cooled bread airtight at room temperature for 2–3 days or freeze sliced bread for up to 2–3 months.
- Reheating: Toast individual slices directly from frozen or warm them briefly in a toaster oven.
- Allergy notes: Contains wheat/gluten and dairy; the optional egg wash adds egg.
- Flavor boosts: Add rosemary and garlic, cinnamon and raisins, sesame seeds, everything seasoning, or shredded cheese.
- Protein boost: Serve each slice with eggs, cottage cheese, Greek yogurt, turkey, chicken, or another protein-rich topping.
- Yeast tip: If the yeast mixture doesn’t become foamy after 10 minutes, check the yeast’s freshness before continuing.
Posted inRecipes Weight Watcher
Bread in a Bag
Posted by
 No Comments
No Comments Post navigation
Previous Post
 16g-Protein Pepperoni Pizza Bites
Next Post
Creamy Chicken Lasagna