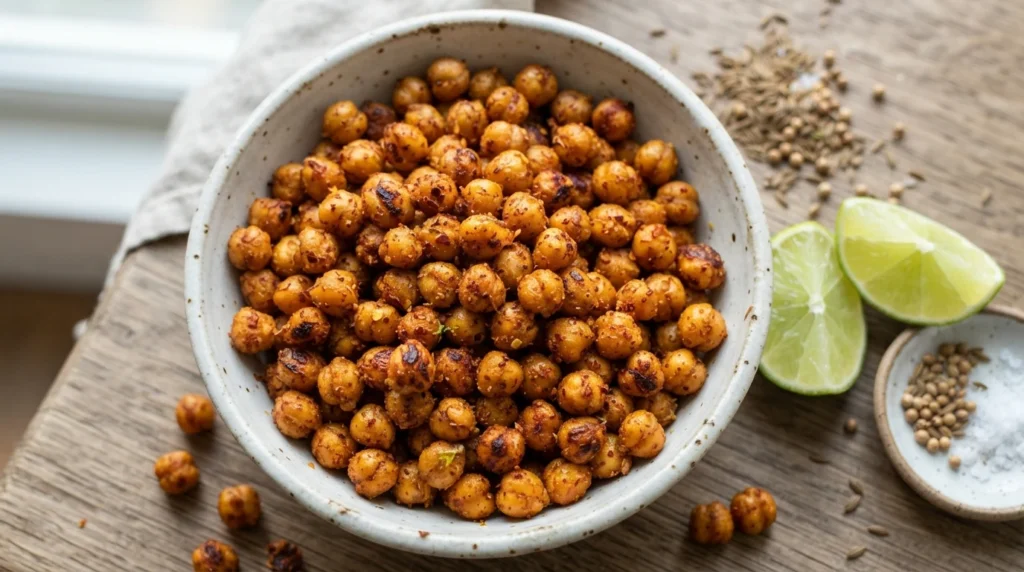

Chickpeas can be notoriously difficult to cook in an air fryer; they tend to steam rather than roast, resulting in a soft texture that lacks the desired snap. The solution lies in starting with dry chickpeas, which must be soaked overnight and then fully cooked before being transferred to the air fryer for the final crisping stage. This method ensures the chickpeas are edible immediately upon finishing, without the need for lengthy boiling or soaking times.
Recipe Overview
Yield: 4 servings (approximately 3 cups cooked)
Total Time: 3 hours and 50 minutes (including soak time)
Air Frying Time: 18–22 minutes per batch
Preparation & Cooking Time: 1 hour 45 minutes active work
Key Equipment Notes
This recipe requires a standard air fryer basket with a capacity of at least 6 cups. Do not overcrowd the basket; cook in two batches if necessary to ensure even airflow and uniform crisping. The chickpeas should be roasted on a single layer without stacking.
Ingredients
Note: All quantities are for dry chickpeas soaked overnight and fully cooked before air frying.
- Dried Chickpeas: 1 cup (approx. 250g), soaked overnight, drained, and boiled until tender but not mushy
- Extra Virgin Olive Oil: 3 tablespoons (45ml)
- Chili Powder: 1 teaspoon (approx. 4g)
- Lime Juice: 2 tablespoons (approx. 30ml), fresh
- Cumin Seeds: 0.5 teaspoon (approx. 2g)
- Garlic Powder: 0.5 teaspoon (approx. 2g)
- Sea Salt: 1 teaspoon (approx. 5g)
Method
The success of this dish depends on the order in which ingredients are introduced to the chickpeas. Adding all spices at once often leads to uneven distribution or burnt edges due to rapid moisture evaporation.
- Prepare the Chickpeas: Begin by soaking dried chickpeas in water for at least 8 hours, preferably overnight. Drain the soaked chickpeas and place them in a pot of fresh water. Bring to a boil, then reduce heat and simmer uncovered for 45–60 minutes until they are tender when pierced with a fork but still hold their shape. This step removes excess starch and prepares the surface for crisping.
- Initial Roast: Preheat your air fryer to 375°F (190°C). Transfer the cooked chickpeas to the basket in a single layer, spreading them out evenly. Cook for 8 minutes without adding any oil or seasoning yet.
- Add Oil: Remove the basket and shake it gently to redistribute the chickpeas. Drizzle the 3 tablespoons of olive oil over them thoroughly. The oil is essential for heat transfer and browning; without it, the chickpeas will remain pale and soft.
- Crisping Phase: Return the basket to the air fryer at 375°F (190°C) and cook for another 8 minutes. Open the door halfway through this interval to check for color; you are looking for a light golden hue, not deep brown.
- Staged Seasoning: Remove the basket again. At this stage, the chickpeas have absorbed enough heat to become crisp but retain some surface moisture that can be managed with seasoning. Sprinkle the chili powder and cumin seeds evenly over the chickpeas. Toss gently by hand or shake the basket lightly to coat.
- Final Seasoning: Return the basket for a final 5-minute cook at 375°F (190°C). This allows the chili and cumin to toast slightly, enhancing their aroma without burning. Once done, remove the basket immediately.
- Lime Finish: Squeeze the fresh lime juice over the hot chickpeas while they are still in the basket. The heat will help distribute the acid evenly. Do not add salt until just before serving, as the residual moisture from cooking can cause premature salting or clumping.
- Serving: Transfer to a serving bowl and toss once more to ensure every piece is coated. Serve warm as a snack, side dish, or garnish for salads.
Troubleshooting Tips
- Soggy Texture: If the chickpeas are soft after air frying, they were likely undercooked during the initial boiling stage. Always ensure they are tender but firm before transferring to the air fryer.
- Burnt Edges: Overcrowding the basket prevents airflow and causes uneven cooking. Rotate the basket halfway through the first cook if necessary, or reduce the quantity per batch.
- Dull Color: If the chickpeas do not brown, they may be coated too heavily with oil or water. Wipe the surface gently with a paper towel before the final seasoning phase to ensure direct contact with spices.
Substitutions and Variations
- Cornstarch Coating: For extra crispness, mix 1 tablespoon of cornstarch with the oil before adding the chickpeas. This creates a thin barrier that promotes browning.
- Spice Adjustments: Replace cumin with coriander or add cayenne pepper for heat. Add spices in small increments (0.25 teaspoon) to taste rather than all at once.
- Dairy-Free Option: This recipe is naturally dairy-free and gluten-free if you use certified gluten-free chili powder.
Storage and Reheating
Allow the chickpeas to cool completely before storing to prevent condensation, which can make them soggy. Store in an airtight container in the refrigerator for up to 3 days. To reheat, place them directly into the air fryer basket at 350°F (175°C) for 4–6 minutes until crisp again.
Frequently Asked Questions
Can I use canned chickpeas?
Canned chickpeas are already cooked and soft. They will steam rather than roast in the air fryer unless you dry them thoroughly first, which is impractical for this recipe. Dry chickpeas must be boiled before air frying.
How do I know when they are done?
The chickpeas are done when they are golden brown and crisp to the touch. Use a food thermometer if needed; the surface should reach approximately 165°F (74°C) if measured, though this is more relevant for internal temperature of meats.
Can I freeze these?
Yes, they can be frozen for up to 3 months. Thaw overnight in the refrigerator and air fry for an additional 5 minutes before serving to restore crispness.