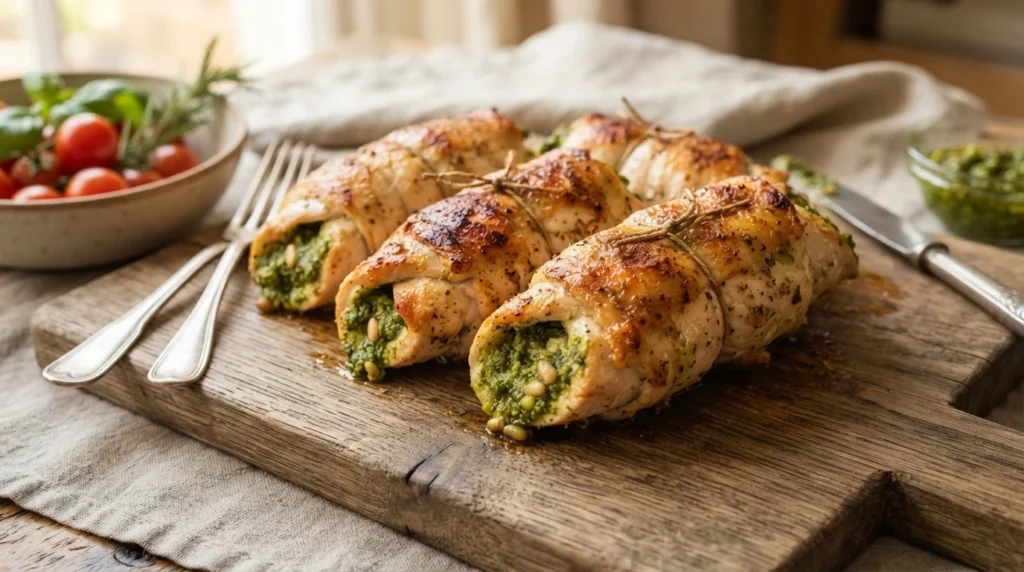

Creating stuffed chicken dishes is a staple of home cooking, but keeping the filling secure without adding heavy breadcrumbs or thickeners can be tricky. For those following a ketogenic diet, finding a keto pesto-stuffed chicken rolls recipe that ensures the roll stays closed during cooking is essential for a successful meal.
Why Stuffed Chicken Rolls Often Fall Apart
The primary challenge with stuffed chicken breasts lies in the structural integrity of the meat itself. When you remove the center to create a pocket, you risk tearing the outer layers, especially if the breast is thin or has been overcooked slightly during the initial preparation. Additionally, without a sufficient binder like egg or breadcrumb mixture, the pesto filling can shift and leak out when the roll is wrapped.
For a keto-friendly approach, traditional binders are often replaced by ingredients that do not add significant carbohydrates. However, this requires careful technique to ensure the roll holds its shape throughout sautéing or baking.
The Binding Factor: Keeping It Secure
To guarantee your rolls stay closed, a binding agent is necessary. While some recipes suggest using cheese alone, a small amount of egg white or yolk provides structural cohesion that helps the pesto adhere to the chicken and prevents it from sliding out.
- Technique: Lightly brush the inside of the chicken pocket with one egg white before adding the pesto. This creates an adhesive layer.
- Alternative: If you prefer not to use eggs, a thin layer of grated mozzarella can help, though it may require slightly longer cooking to melt and set.
Preparation Steps for Keto Pesto-Stuffed Chicken Rolls
This method focuses on creating uniform rolls that cook evenly without drying out the protein or spilling the sauce.
Ingredients
- Chicken Breasts: 4 large boneless, skinless chicken breasts (approx. 250g each), trimmed of excess fat and silver skin.
- Pesto Sauce: 2 cups pre-made pesto (check label for carbs; traditional basil pesto typically contains around 1g net carb per tablespoon).
- Egg White: 1 large egg white, beaten slightly.
- Cheese (Optional but Recommended): 2 oz shredded mozzarella or parmesan for extra binding and flavor.
- Olive Oil: 2 tablespoons for searing.
- Salt and Pepper: To taste.
Method
- Preparation of Chicken: Gently pound each chicken breast to an even thickness of about 1/2 inch. Using a uniform thickness ensures even cooking and makes rolling easier.
- Creating the Pocket: Place one breast on a cutting board. Using a sharp knife, slice horizontally from top to bottom, stopping just short of the bottom edge to create a pocket. Be careful not to cut all the way through.
- Binding the Pocket: Lightly brush the inside of the chicken pocket with the beaten egg white. This is crucial for adhesion.
- Filling: Spoon approximately 1/2 cup of pesto into each pocket. Do not overfill, or the roll will be too tight and difficult to close evenly.
- Rolling: Using your fingers, gently roll the chicken breast into a cylinder shape. Apply even pressure from the center outward to seal the seam at the bottom. If using cheese, press it firmly against the pesto layer during this step.
- Searing: Heat a large skillet over medium-high heat with olive oil. Place the rolls seam-side down and sear for 3-4 minutes until golden brown and slightly sealed.
- Cooking Through: Flip the rolls and cook on the other side for another 3-4 minutes. The internal temperature should reach 165°F (74°C) as measured by a meat thermometer inserted into the center of the roll, not touching the pan.
Troubleshooting: Common Issues and Fixes
Even with careful technique, issues can arise. Here is how to address them:
The Roll Opens During Cooking
Cause: The filling was too voluminous for the pocket, or the binding agent (egg white) was insufficient.
Fix: If you catch a roll opening during searing, wrap it briefly in foil to contain the juices, but be aware this may create steam pockets that puff up the meat. For future batches, ensure the pesto layer is about 1/4 inch thick and the egg white is applied generously.
Dry Chicken Texture
Cause: Overcooking or a pocket that is too deep relative to the breast thickness.
Fix: Always use a meat thermometer. Remove the chicken from heat once it reaches 165°F and let it rest for 5 minutes. This allows the juices to redistribute, preventing dryness when sliced or served.
Pesto Leaks Out
Cause: The roll was not sealed tightly enough at the seam.
Fix: Before searing, use a small amount of watered-down pesto (mixed with a teaspoon of olive oil) to brush the outside of the rolled seam. This helps seal it before cooking.
Substitutions and Variations
You can adapt this recipe based on ingredient availability or flavor preferences, keeping carbohydrate counts in mind.
- Pesto Variation: If you cannot find pre-made pesto, blend fresh basil, garlic, olive oil, lemon juice, and a small amount of nutritional yeast. Avoid using pine nuts if they are high in fat for keto purposes; use slivered almonds instead or omit.
- Cheese Swap: Mozzarella is ideal for melting. Parmesan adds saltiness but does not melt as readily. For a creamier texture, mix parmesan with a small amount of heavy cream inside the roll (use sparingly).
Storage and Reheating
To maintain quality, store cooked rolls in an airtight container in the refrigerator for up to 3 days. For longer storage, freeze individual rolls wrapped tightly in plastic wrap and then foil; they can be kept for up to 2 months.
When reheating, avoid microwaving as it can dry out the chicken and make the pesto oily. Instead, reheat in a preheated oven at 375°F (190°C) for 15-20 minutes until heated through, or pan-sear briefly in a skillet with a little butter.
Final Thoughts
Satisfying keto pesto-stuffed chicken rolls are achievable with the right technique. By focusing on proper rolling pressure and utilizing egg white as a binding agent, you can ensure your rolls stay closed and cook evenly. Remember that portion control and monitoring internal temperature are key to both food safety and maintaining the texture of the dish.