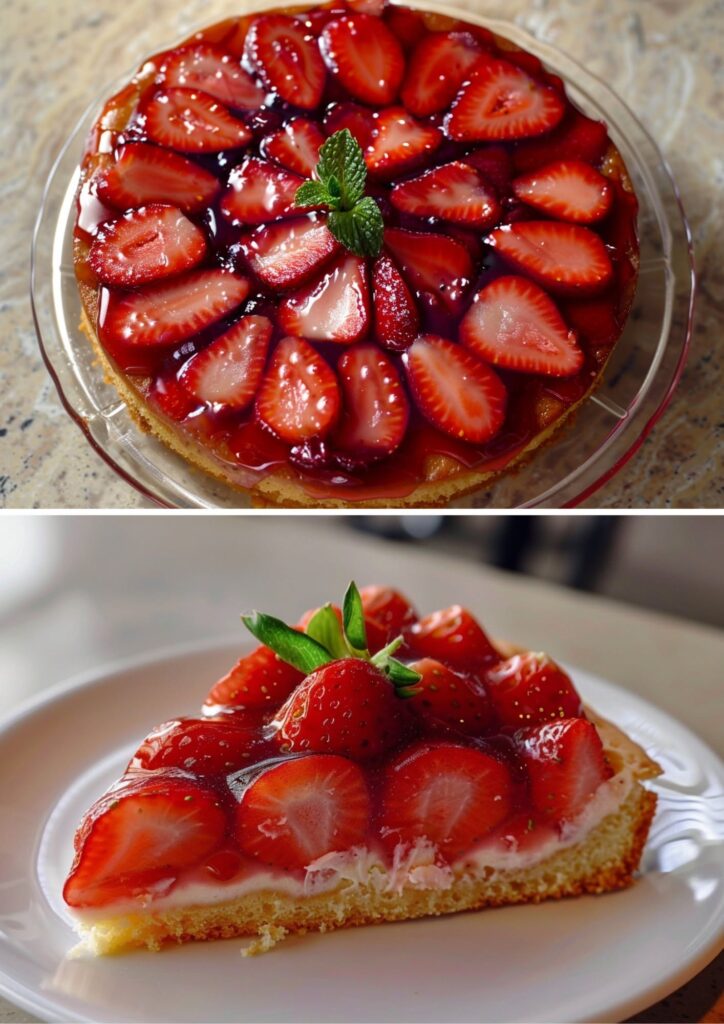
This beautiful vegan upside-down strawberry cake features juicy caramelized strawberries on top of a soft, tender vanilla cake. Once inverted, the strawberries create a glossy, jewel-like topping that’s perfect for spring and summer gatherings.
Yield: 8–10 servingsPrep Time: 25 minutesBake Time: 40–45 minutesTotal Time: About 1 hour 15 minutes
Ingredients
Join Our Free Facebook Group
Ready, set, go! Get delicious new recipes, time-saving tips and reader favorites in your feed — completely free.
Join the Group
×
For the Strawberry Topping
Join Our Free Facebook Group
Ready, set, go! Get delicious new recipes, time-saving tips and reader favorites in your feed — completely free.
Join the Group
×
500 g (1 lb) fresh strawberries
3 tbsp vegan butter, melted
⅓ cup (70 g) light brown sugar
1 tbsp lemon juice
1 tsp vanilla extract
For the Cake Batter
Join Our Free Facebook Group
Ready, set, go! Get delicious new recipes, time-saving tips and reader favorites in your feed — completely free.
Join the Group
×
2 cups (250 g) all-purpose flour
1½ tsp baking powder
½ tsp baking soda
½ tsp salt
¾ cup (150 g) granulated sugar
⅓ cup (80 ml) neutral oil (sunflower, canola, or vegetable)
1 cup (240 ml) unsweetened plant milk
1 tbsp lemon juice or apple cider vinegar
2 tsp vanilla extract
¼ tsp almond extract (optional)
Equipment
Join Our Free Facebook Group
Ready, set, go! Get delicious new recipes, time-saving tips and reader favorites in your feed — completely free.
Join the Group
×
9-inch (23 cm) round cake pan
Parchment paper
Mixing bowls
Whisk
Rubber spatula
Step 1: Prepare the Oven and Pan
Join Our Free Facebook Group
Ready, set, go! Get delicious new recipes, time-saving tips and reader favorites in your feed — completely free.
Join the Group
×
Preheat the oven to 175°C (350°F) .
Lightly grease a 9-inch round cake pan.
Cut a circle of parchment paper to fit the bottom.
Place the parchment inside the pan.
Lightly grease the parchment as well.
This helps the strawberry topping release cleanly after baking.
Step 2: Prepare the Strawberries
Join Our Free Facebook Group
Ready, set, go! Get delicious new recipes, time-saving tips and reader favorites in your feed — completely free.
Join the Group
×
Wash and dry the strawberries thoroughly.
Remove the green tops.
Halve large strawberries.
Leave smaller strawberries whole or halved.
Try to keep pieces similar in size for even cooking.
Step 3: Make the Caramel Layer
Join Our Free Facebook Group
Ready, set, go! Get delicious new recipes, time-saving tips and reader favorites in your feed — completely free.
Join the Group
×
In a small bowl combine:
Melted vegan butter
Brown sugar
Lemon juice
Vanilla extract
Mix until the sugar is evenly moistened.
Step 4: Assemble the Strawberry Base
Join Our Free Facebook Group
Ready, set, go! Get delicious new recipes, time-saving tips and reader favorites in your feed — completely free.
Join the Group
×
Pour the brown sugar mixture into the prepared cake pan.
Spread evenly across the bottom.
Arrange strawberries cut-side down in a decorative pattern.
Pack them fairly closely together because they shrink slightly while baking.
Set aside.
Step 5: Make Vegan Buttermilk
Join Our Free Facebook Group
Ready, set, go! Get delicious new recipes, time-saving tips and reader favorites in your feed — completely free.
Join the Group
×
Add 1 tbsp lemon juice (or vinegar) to the plant milk.
Stir gently.
Let stand for 5–10 minutes.
The mixture will thicken slightly.
Step 6: Mix the Dry Ingredients
Join Our Free Facebook Group
Ready, set, go! Get delicious new recipes, time-saving tips and reader favorites in your feed — completely free.
Join the Group
×
In a large bowl whisk together:
Flour
Baking powder
Baking soda
Salt
Mix thoroughly.
Step 7: Mix the Wet Ingredients
Join Our Free Facebook Group
Ready, set, go! Get delicious new recipes, time-saving tips and reader favorites in your feed — completely free.
Join the Group
×
In a separate bowl whisk together:
Sugar
Oil
Vegan buttermilk
Vanilla extract
Almond extract (if using)
Whisk until smooth.
Step 8: Make the Batter
Join Our Free Facebook Group
Ready, set, go! Get delicious new recipes, time-saving tips and reader favorites in your feed — completely free.
Join the Group
×
Pour the wet ingredients into the dry ingredients.
Stir gently with a spatula.
Mix only until no dry flour remains.
A few small lumps are acceptable.
Do not overmix, or the cake may become dense.
Step 9: Fill the Pan
Join Our Free Facebook Group
Ready, set, go! Get delicious new recipes, time-saving tips and reader favorites in your feed — completely free.
Join the Group
×
Carefully spoon the batter over the strawberries.
Spread evenly using a spatula.
Smooth the top.
Avoid disturbing the strawberry arrangement underneath.
Step 10: Bake
Join Our Free Facebook Group
Ready, set, go! Get delicious new recipes, time-saving tips and reader favorites in your feed — completely free.
Join the Group
×
Place the pan on the center oven rack.
Bake at 175°C (350°F) for 40–45 minutes .
The Cake Is Done When:
Join Our Free Facebook Group
Ready, set, go! Get delicious new recipes, time-saving tips and reader favorites in your feed — completely free.
Join the Group
×
The top is lightly golden.
A toothpick inserted in the center comes out clean.
The cake springs back lightly when touched.
If the top browns too quickly, loosely tent with foil.
Step 11: Cool Briefly
Join Our Free Facebook Group
Ready, set, go! Get delicious new recipes, time-saving tips and reader favorites in your feed — completely free.
Join the Group
×
Remove from the oven.
Let the cake cool in the pan for 10–15 minutes .
Do not let it cool completely in the pan, or the caramelized topping may stick.
Step 12: Invert the Cake
Join Our Free Facebook Group
Ready, set, go! Get delicious new recipes, time-saving tips and reader favorites in your feed — completely free.
Join the Group
×
Run a thin knife around the edges.
Place a serving plate over the cake pan.
Carefully invert the pan onto the plate.
Let sit for 1 minute.
Lift off the pan slowly.
If any strawberries remain in the pan, simply place them back onto the cake.
Step 13: Cool and Serve
Join Our Free Facebook Group
Ready, set, go! Get delicious new recipes, time-saving tips and reader favorites in your feed — completely free.
Join the Group
×
Allow the cake to cool for at least 20 minutes before slicing.
The topping will set slightly while remaining glossy and juicy.
Optional Strawberry Glaze
Join Our Free Facebook Group
Ready, set, go! Get delicious new recipes, time-saving tips and reader favorites in your feed — completely free.
Join the Group
×
For an extra shiny finish:
Ingredients
Join Our Free Facebook Group
Ready, set, go! Get delicious new recipes, time-saving tips and reader favorites in your feed — completely free.
Join the Group
×
2 tbsp strawberry jam
1 tsp water
Method
Join Our Free Facebook Group
Ready, set, go! Get delicious new recipes, time-saving tips and reader favorites in your feed — completely free.
Join the Group
×
Warm the jam and water together.
Stir until smooth.
Brush lightly over the strawberries while the cake is still warm.
Optional Coconut Whipped Cream
Join Our Free Facebook Group
Ready, set, go! Get delicious new recipes, time-saving tips and reader favorites in your feed — completely free.
Join the Group
×
Ingredients
Join Our Free Facebook Group
Ready, set, go! Get delicious new recipes, time-saving tips and reader favorites in your feed — completely free.
Join the Group
×
1 can chilled full-fat coconut milk
2 tbsp powdered sugar
1 tsp vanilla extract
Method
Join Our Free Facebook Group
Ready, set, go! Get delicious new recipes, time-saving tips and reader favorites in your feed — completely free.
Join the Group
×
Scoop out the solid coconut cream.
Whip until fluffy.
Add sugar and vanilla.
Continue whipping until smooth.
Serve alongside slices of cake.
Storage
Join Our Free Facebook Group
Ready, set, go! Get delicious new recipes, time-saving tips and reader favorites in your feed — completely free.
Join the Group
×
Room Temperature
Join Our Free Facebook Group
Ready, set, go! Get delicious new recipes, time-saving tips and reader favorites in your feed — completely free.
Join the Group
×
Refrigerator
Join Our Free Facebook Group
Ready, set, go! Get delicious new recipes, time-saving tips and reader favorites in your feed — completely free.
Join the Group
×
Up to 4 days in an airtight container.
Freezer
Join Our Free Facebook Group
Ready, set, go! Get delicious new recipes, time-saving tips and reader favorites in your feed — completely free.
Join the Group
×
Freeze slices individually for up to 2 months.