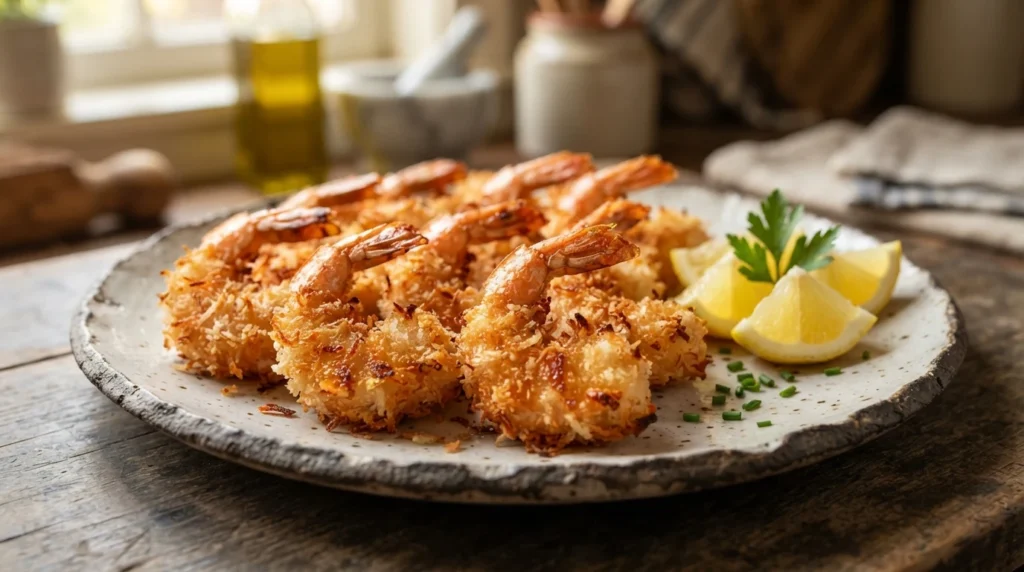

Coconut shrimp offers a delightful contrast between sweet, flaky coconut and savory shrimp, but achieving a coating that truly adheres and crisps up in an air fryer often requires specific preparation steps. The secret lies not in soaking the shrimp (which makes them soggy), but in using a dry egg wash followed by a thick layer of panko-style breadcrumbs mixed with grated coconut.
Why This Coating Technique Works
The challenge with air frying breaded items is that the rapid airflow can blow away loose crumbs, leaving behind uneven patches. To solve this, we use a dry egg wash. Unlike traditional recipes that soak shrimp in liquid for minutes on end, our method applies a thin layer of beaten egg directly to the surface. This acts as an immediate glue, binding the subsequent dry breadcrumb mixture tightly before it even hits the air fryer basket.
Recipe Overview
- Servings: 4
- Preparation Time: 15 minutes (includes marinating)
- Air Fry Time: 8–10 minutes per batch
- Total Time: 23–25 minutes
This recipe yields 4 servings. Plan to cook the shrimp in two batches if your air fryer basket is smaller than 1 quart (approx. 1 liter) to ensure even air circulation.
Equipment and Capacity Notes
Success depends on proper loading. Do not overcrowd the basket; leave space between pieces for airflow. A standard 1-quart or larger air fryer basket is recommended. If using a smaller model, cook in two batches with a 2-minute rest between them.
Ingredients
- Shrimp: 480g (raw, peeled and deveined, tail-on preferred), thawed if frozen
- Panko breadcrumbs: 120g
- Grated unsweetened coconut: 60g
- Large egg: 1 unit (beaten)
- Vegetable oil: 30ml (for brushing basket and coating shrimp)
- Salt: 5g
- Black pepper: 2g
- Paprika or cayenne pepper: 1g (optional, for color and heat)
Instructions
Step 1: Prepare the Shrimp
Thaw shrimp completely if frozen. Rinse gently under cold water and pat thoroughly dry with paper towels. Moisture on the surface is the enemy of adhesion; any remaining dampness will prevent the egg from sticking properly.
Step 2: The Dry Coating Mix
In a shallow bowl, combine the panko breadcrumbs, grated coconut, salt, pepper, and paprika. Stir well to distribute the spices evenly throughout the dry mixture.
Step 3: Apply the Egg Wash
Place the shrimp in a single layer on a work surface or cutting board. In a separate small bowl, beat the egg. Using a pastry brush or your fingers, apply a thin, even layer of beaten egg over each shrimp piece. Avoid getting too much egg on the very bottom where it will touch the basket, but ensure the top and sides are fully covered.
Step 4: Coat Thoroughly
Immediately transfer the egg-washed shrimp to the breadcrumb mixture. Turn gently to coat all sides evenly. Press down slightly on each piece with your hand to embed the coconut into the panko and ensure contact with the egg layer. Set them aside on a wire rack or parchment-lined plate, avoiding stacking.
Step 5: Preheat and Oil
Preheat your air fryer to 200°F (93°C) for 3 minutes. Lightly brush the basket with vegetable oil to prevent sticking and aid browning. If you have time, lightly brushing the coated shrimp with a tiny bit of oil before frying can enhance crispness, but it is not strictly necessary if the egg layer is intact.
Step 6: Air Fry
Arrange the shrimp in a single layer in the basket, ensuring they do not touch. Cook at 200°F (93°C) for 8 minutes. Open the basket and flip each piece carefully to ensure even browning on all sides. Continue cooking for another 4–6 minutes, or until the coating is deep golden brown and crispy.
Doneness Check
While visual cues are important, use a food thermometer to ensure safety. The shrimp should reach an internal temperature of 145°F (63°C). Overcooking can make them rubbery; if they appear done visually but the center is slightly translucent, add 1 more minute rather than flipping again.
Troubleshooting
- Coating falls off: The shrimp may have been too damp when applying the egg wash. Ensure they are bone-dry before brushing with egg.
- Crispy exterior, raw interior: The pieces were likely too large or overcrowded. Reduce portion size per batch and ensure 145°F (63°C) is reached.
- Mushy texture: The shrimp may not have been dried sufficiently before coating, or they were cooked for too long. Always pat dry thoroughly.
Serving Suggestions
Serve immediately while hot and crisp. Pair with a simple dipping sauce made from melted butter, lemon juice, and a dash of Worcestershire sauce, or a spicy sriracha mayo. Garnish with fresh cilantro or green onions if desired.
Storage and Reheating
Store cooked shrimp in an airtight container in the refrigerator for up to 3 days. Do not store them unrefrigerated for extended periods due to food safety guidelines.
To reheat, place shrimp back in the air fryer basket at a single layer. Cook at 200°F (93°C) for 3–4 minutes until heated through and crispness returns. Avoid microwaving, as it tends to steam the coating.
Frequently Asked Questions
Can I use frozen shrimp?
Yes, but ensure they are completely thawed and dried before applying the egg wash. Cooking from frozen can lead to uneven cooking and a soggy bottom layer.
What if my air fryer doesn’t have a temperature setting?
Most modern models do, but if yours is old or lacks this feature, set it to the highest temperature available (usually 200°F/93°C) and monitor closely. You may need to extend cooking time by 1–2 minutes.
Is coconut shrimp keto-friendly?
Traditional versions are not keto-friendly due to the high carbohydrate content in panko breadcrumbs and coconut. For a lower-carb version, substitute the panko with crushed pork rinds or almond flour mixed with coconut flakes.