Introduction
There’s something incredibly satisfying about making your own dark chocolate from scratch. With just a handful of simple ingredients, you can create rich, silky chocolate that melts in your mouth and tastes even better than many store-bought varieties. The beauty of homemade dark chocolate is that you control everything—from the sweetness to the cocoa intensity—allowing you to make it exactly the way you like it.
I started making homemade dark chocolate because I wanted a cleaner treat without unnecessary preservatives or artificial flavors. After my first batch, I was hooked. The deep cocoa flavor, smooth texture, and ability to customize every bite made it one of my favorite homemade treats. Whether I add crunchy almonds, sea salt, shredded coconut, or simply enjoy it plain, every batch feels a little special.
If you’re following a highprotein or lower-sugar lifestyle, homemade dark chocolate can easily fit into your routine when enjoyed in moderation. Pair it with Greek yogurt, nuts, or cottage cheese for a satisfying snack that balances healthy fats and protein. It’s perfect for gifting, holiday treats, or simply keeping in the refrigerator whenever a chocolate craving strikes.
The best part? You don’t need any fancy equipment or candy-making experience. In less than 30 minutes, you’ll have beautiful homemade chocolate bars that look impressive and taste absolutely amazing.
Can This Homemade Dark Chocolate Support Weight Loss Goals?
Yes, when enjoyed in moderation. Dark chocolate made with quality cocoa contains healthy fats and antioxidants that can make a small serving feel satisfying. Using natural sweeteners and controlling portion sizes allows this recipe to fit into a balanced eating plan. Pairing a piece of dark chocolate with protein-rich foods such as Greek yogurt or a handful of almonds can also help create a more filling snack.
Does Homemade Dark Chocolate Fit a highprotein Lifestyle?
Dark chocolate itself is not naturally high in protein, but it complements a highprotein lifestyle very well. Pair it with Greek yogurt, cottage cheese, roasted nuts, or a protein smoothie for a balanced snack. You can even stir unflavored or chocolate protein powder into the melted mixture for a small protein boost while maintaining a rich chocolate flavor.
Why This Recipe Is Special
- Made with only a few wholesome ingredients.
- Easily customized with your favorite mix-ins.
- No artificial preservatives or additives.
- Naturally gluten-free and easy to make dairy-free.
- Perfect for gifting, snacking, or healthy desserts.
My Personal Experience
- The first time I made homemade chocolate, I was surprised by how easy it was.
Watching the glossy chocolate set into beautiful bars made me wonder why I hadn’t tried it sooner. - Sea salt completely transforms the flavor.
Just a light sprinkle creates an incredible contrast that makes the chocolate taste richer. - Silicone molds make removal effortless.
They help create neat chocolate bars without breaking or sticking. - I always make a double batch.
It stores well, and friends and family always ask for a few pieces once they taste it.
Perfect For
This Homemade Dark Chocolate is perfect for holiday gifts, Valentine’s Day treats, healthy desserts, afternoon snacks, homemade candy boxes, meal prep, edible gifts, Christmas cookie trays, birthday favors, and chocolate lovers looking for a simple homemade recipe.
Why You’ll Love This Recipe
- Rich, intense chocolate flavor.
Every bite is smooth, creamy, and packed with deep cocoa goodness. - Completely customizable.
Add nuts, seeds, dried fruit, coconut, or spices to create your perfect chocolate. - Simple ingredients.
No complicated candy-making techniques required. - Stores beautifully.
Keep a batch in the refrigerator for whenever cravings strike. - Better than many store-bought options.
You control the sweetness and ingredient quality.
Common Mistakes to Avoid
- Overheating the cocoa butter can make the chocolate grainy.
- Allowing water to get into the mixture may cause the chocolate to seize.
- Skipping the sifting step can leave small cocoa powder lumps.
- Refrigerating too quickly may cause condensation on the finished chocolate.
Required Equipment
- Double Boiler or Heatproof Bowl — Gently melts the cocoa butter without burning.
- Silicone Spatula — Mixes ingredients smoothly and minimizes waste.
- Fine Mesh Sifter — Removes lumps from the cocoa powder.
- Silicone Chocolate Molds — Creates beautiful chocolate bars and makes unmolding easy.
- Kitchen Scale (Optional) — Provides precise measurements for consistent results.
Storage Instructions
Refrigerator: Store the chocolate in an airtight container for up to 3 weeks.
Freezer: Freeze for up to 3 months in a freezer-safe container with parchment paper between layers.
Room Temperature: Keep in a cool, dry place away from sunlight for up to 1 week, depending on your room temperature.
For the best texture, allow refrigerated chocolate to sit at room temperature for 5 minutes before enjoying.
Recipe Details
Preparation Time: 15 minutes
Cooking Time: 10 minutes
Cooling Time: 1 hour
Total Time: 1 hour 25 minutes
Servings: 12 pieces
Best Season: All-season
Total Calories (Per Serving): Approximately 125 calories (Estimate)
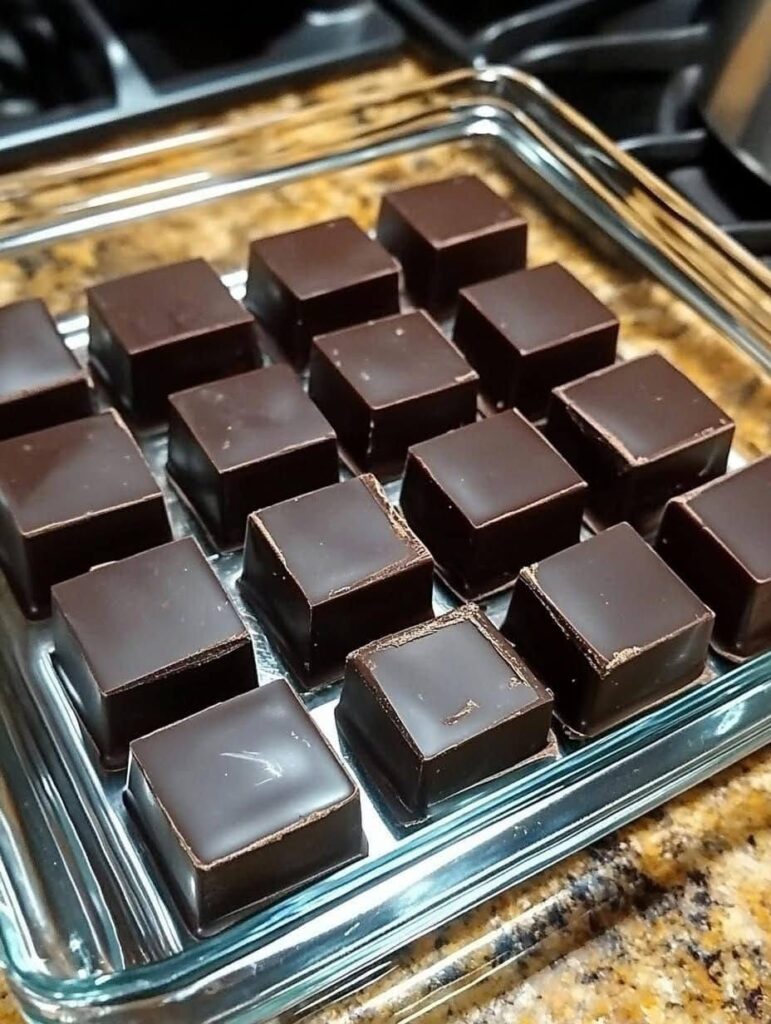
Short Description
This Homemade Dark Chocolate is rich, smooth, and made with just a few simple ingredients. Naturally customizable and free from unnecessary additives, it’s the perfect homemade treat for gifting, snacking, or satisfying chocolate cravings.
📝 Ingredients
- 1 cup food-grade cocoa butter, finely chopped
- ¾ cup unsweetened cocoa powder, sifted
- 3 tablespoons maple syrup or honey (adjust to taste)
- 1 teaspoon vanilla extract
- Pinch of fine sea salt
Optional Mix-Ins
- ¼ cup chopped roasted almonds
- ¼ cup chopped hazelnuts
- 2 tablespoons shredded unsweetened coconut
- 2 tablespoons cacao nibs
- 1 tablespoon chia seeds
- Flaky sea salt for topping
- Freeze-dried raspberries
- Orange zest
- Crushed pistachios
Directions
Step 1 – Melt the Cocoa Butter
Fill a saucepan with a few inches of water and bring it to a gentle simmer over low heat.
Place the cocoa butter in a heatproof bowl over the saucepan, making sure the bottom of the bowl doesn’t touch the water.
Stir for 5–7 minutes until completely melted.
Texture Cue: The cocoa butter should be clear and silky with no solid pieces remaining.
Step 2 – Add the Cocoa Powder
Remove the bowl from the heat.
Gradually whisk in the sifted cocoa powder until smooth.
Add the maple syrup, vanilla extract, and sea salt.
Continue whisking for 2–3 minutes until glossy.
Texture Cue: The mixture should look smooth, shiny, and pourable.
Step 3 – Add Mix-Ins
If using nuts, coconut, cacao nibs, or dried fruit, gently fold them into the chocolate mixture.
Step 4 – Pour Into Molds
Carefully pour the chocolate into silicone molds or a parchment-lined loaf pan.
Gently tap the molds on the counter to remove air bubbles.
Sprinkle additional toppings over the surface if desired.
Step 5 – Chill
Place the molds in the refrigerator for 1 hour, or until completely firm.
Once set, carefully remove the chocolate from the molds.
Highprotein Cooking Tip
For a protein boost, enjoy a piece of homemade dark chocolate alongside Greek yogurt, cottage cheese, or a handful of roasted almonds. If experimenting, you can also mix a small amount of unflavored protein powder into the chocolate mixture, though it may slightly change the texture.
Nutrition Facts (Per Serving – Approximate)
- Calories: 125
- Fats: 11 g
- Cholesterol: 0 mg
- Sodium: 15 mg
- Potassium: 120 mg
- Total Carbohydrates: 8 g
- Fiber: 3 g
- Net Carbs: 5 g
- Sugars: 4 g
- Protein: 2 g
- Calcium: 12 mg
Notes
- Use high-quality cocoa powder for the richest flavor.
- Keep all utensils completely dry to prevent the chocolate from seizing.
- Adjust the sweetener to suit your preferred level of bitterness.
- Silicone molds make it easy to create professional-looking chocolate bars.
- Add spices like cinnamon, espresso powder, or chili powder for unique flavor variations.
- Store in a cool place to maintain a smooth texture.
Frequently Asked Questions
Can I use coconut oil instead of cocoa butter?
Yes, but the chocolate will be softer and melt more quickly at room temperature.
Why did my chocolate become grainy?
This usually happens if moisture gets into the mixture or if the cocoa butter overheats.
Can I make this sugar-free?
Yes. Replace the maple syrup or honey with a powdered sugar-free sweetener that’s suitable for baking.
What cocoa powder works best?
Dutch-process cocoa creates a smoother, milder flavor, while natural cocoa powder offers a more intense chocolate taste.
Can I add dried fruit or nuts?
Absolutely! Chopped almonds, pistachios, hazelnuts, freeze-dried berries, and coconut all make excellent additions.
How long does homemade dark chocolate last?
Stored properly in an airtight container, it stays fresh for up to 3 weeks in the refrigerator.
Serving Suggestions
Enjoy this Homemade Dark Chocolate with:
- Fresh strawberries
- Greek yogurt parfaits
- Homemade trail mix
- Espresso or coffee
- Hot chocolate boards
- Cheese platters
- Fruit and nut snack boxes
- Overnight oats
- Protein smoothies
- Ice cream or frozen yogurt
Final Thoughts
Making Homemade Dark Chocolate is one of those kitchen projects that feels surprisingly rewarding. With just a few pantry staples, you can create a rich, elegant treat that’s easy to customize and perfect for sharing. Whether you enjoy it plain, topped with flaky sea salt, or filled with crunchy nuts and fruit, each piece has a deep chocolate flavor that’s hard to beat.
Once you’ve made your own dark chocolate, you’ll love how easy it is to experiment with different flavors and textures. Keep a batch in the fridge for whenever a chocolate craving hits, or package a few bars in decorative bags—they make thoughtful homemade gifts that always impress. 🍫✨