
Description
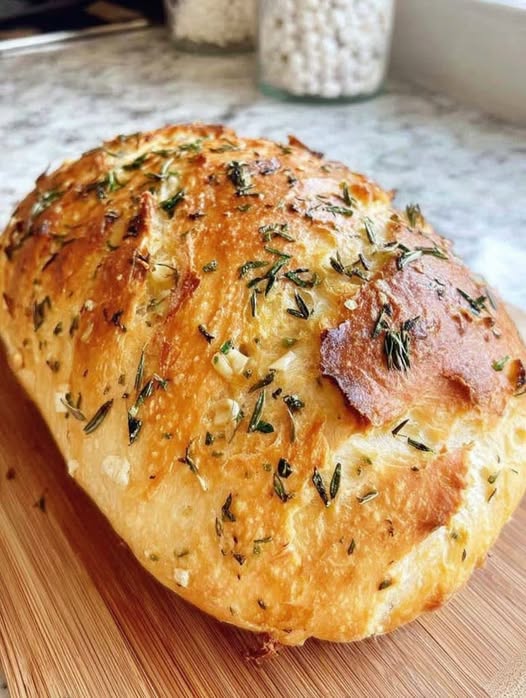
This Gluten-Free Bread is soft, light, and beautifully structured with a tender crumb and slightly crisp golden crust. Unlike many gluten-free loaves that turn dense or dry, this recipe is designed to stay moist, airy, and satisfying with every slice.
Made with a balanced blend of gluten-free flours and simple pantry ingredients, it delivers a bakery-style texture that works perfectly for sandwiches, toast, or everyday meals. It’s comforting, versatile, and ideal for anyone looking for a reliable homemade gluten-free bread recipe.
Naturally adaptable, it can also be made higher in protein by using seed flours or adding nutritional boosts.
Short Description
Soft and fluffy gluten-free homemade bread loaf.
Perfect for sandwiches, toast, and everyday baking.
Light texture with a golden bakery-style crust.
Can This Gluten-Free Bread Support Weight Loss Goals?
Yes, this bread can fit into a balanced eating plan when portioned properly. While gluten-free bread is still carbohydrate-based, homemade versions allow control over ingredients like added sugars and oils. When paired with protein-rich foods such as eggs, chicken, or nut butter, it can be part of a satisfying and balanced meal.
Does Gluten-Free Bread Fit a High-Protein Lifestyle?
On its own, gluten-free bread is not high in protein, but it can be adapted or paired easily with high-protein foods. Using seed flours like almond or adding chia and flax can increase protein content slightly. It also works well as a base for protein-rich toppings like eggs, tuna, turkey, or Greek yogurt spreads.
Why This Recipe is Special
- Soft, non-dry gluten-free texture.
- No gumminess when properly baked.
- Beginner-friendly homemade method.
- Works for toast, sandwiches, and snacks.
- Easily customizable with seeds or herbs.
My Personal Experience
- Getting the flour blend right is everything.
It determines whether the bread is soft or dense. - Hydration matters more in gluten-free baking.
Slightly wet dough creates better texture. - Letting it rest improves structure.
It prevents crumbling when sliced. - The crust forms beautifully in a hot oven.
It gives that bakery-style finish. - It slices best after cooling fully.
Warm slicing can cause breakage.
Perfect For
This gluten-free bread is perfect for gluten-free diets, sandwich lovers, breakfast toast, meal prep, sensitive digestion diets, homemade baking enthusiasts, and family-friendly everyday meals.
Why You’ll Love This Recipe
- Soft and fluffy texture.
No dense or dry bread. - Gluten-free and versatile.
Works for sweet or savory uses. - Easy homemade method.
No complicated steps. - Great for meal prep.
Stores and freezes well. - Customizable ingredients.
Add seeds, herbs, or spices.
Common Mistakes to Avoid
- Using too little moisture, leading to dry bread.
- Skipping binding agents like eggs or psyllium husk.
- Not allowing proper rise time.
- Slicing before the bread fully cools.
Required Equipment
- Mixing bowl — For combining gluten-free batter.
- Loaf pan — Helps maintain structure while baking.
- Whisk or mixer — Ensures smooth batter consistency.
- Spatula — For scraping and mixing evenly.
- Oven — For baking to golden perfection.
Storage Instructions
Room Temperature
Store in an airtight container for up to 2 days.
Refrigerator
Keeps for 4–5 days, best toasted before eating.
Freezer
Freeze slices for up to 2 months for best freshness.
Reheating
- Toaster: best for crisp texture
- Oven: 5–8 minutes at 180°C
- Microwave: 10–15 seconds (softer texture)
Recipe Details
Preparation Time: 15 minutes
Cooking Time: 45–55 minutes
Total Time: 1 hour 10 minutes
Servings: 10 slices
Best Season for This Recipe: All-Season
Total Calories (Per Slice): Approximately 160 calories
📝 Ingredients
Dry Ingredients
- 2 cups gluten-free all-purpose flour blend
- 1 cup almond flour (for softness and protein boost)
- 2 teaspoons baking powder
- 1 teaspoon salt
- 1 tablespoon psyllium husk powder (for structure)
Wet Ingredients
- 3 large eggs
- 1 cup warm milk (or almond milk)
- 2 tablespoons olive oil or melted butter
- 1 teaspoon apple cider vinegar
- 1 teaspoon honey or sugar (optional, for yeast activation if used)
Optional Add-Ins
- 1 tablespoon chia seeds
- 1 tablespoon flaxseeds
- Herbs (rosemary, thyme, garlic powder)
Optional High-Protein Boost
- Extra egg whites
- Protein-enriched flour blend
- Greek yogurt (replace part of milk)
Directions
1. Prepare Oven and Pan
- Preheat oven to 180°C (350°F).
- Grease or line loaf pan with parchment paper.
- Visual Cue: Ready baking setup.
2. Mix Dry Ingredients
- Combine gluten-free flour, almond flour, baking powder, salt, and psyllium husk.
- Texture Cue: Even, powdery mixture.
3. Mix Wet Ingredients
- Whisk eggs, milk, oil, and vinegar together.
- Texture Cue: Smooth liquid base.
4. Combine Batter
- Mix wet and dry ingredients until thick batter forms.
- Do not overmix.
- Visual Cue: Sticky, thick dough-like batter.
5. Transfer to Pan
- Pour into loaf pan and smooth top.
- Let rest 10 minutes before baking.
6. Bake
- Bake for 45–55 minutes.
- Heat Level: Medium oven.
- Texture Cue: Golden top, firm center.
7. Cool
- Let cool completely before slicing.
High-Protein Cooking Tips
- Add almond flour for natural protein boost.
- Use extra egg whites for lean protein.
- Greek yogurt improves both moisture and protein content.
- Pair with protein-rich toppings like eggs or chicken.
Nutrition Facts (Per Slice – Approximate)
| Nutrient | Amount |
|---|---|
| Calories | 160 |
| Fats | 8g |
| Cholesterol | 45mg |
| Sodium | 190mg |
| Potassium | 90mg |
| Total Carbohydrates | 16g |
| Fiber | 3g |
| Net Carbs | 13g |
| Sugars | 1g |
| Protein | 6g |
| Calcium | 40mg |
Notes
- Always include a binding agent (psyllium or eggs).
- Batter should be thick, not runny.
- Let bread cool fully before slicing.
- Store tightly wrapped to avoid drying out.
- Toasting improves texture significantly.
- Can be made dairy-free with substitutions.
- Best eaten fresh or lightly toasted.
Frequently Asked Questions
1. Why is my gluten-free bread dense?
It may need more leavening or better flour balance.
2. Can I make it vegan?
Yes, use flax eggs and plant-based milk.
3. Why is it crumbly?
It likely lacks enough binding agents like psyllium or eggs.
4. Can I skip almond flour?
Yes, but texture will be slightly less soft.
5. Can I freeze it?
Yes, slice and freeze for easy use.
6. Do I need a mixer?
No, a whisk or spoon works fine for this recipe.