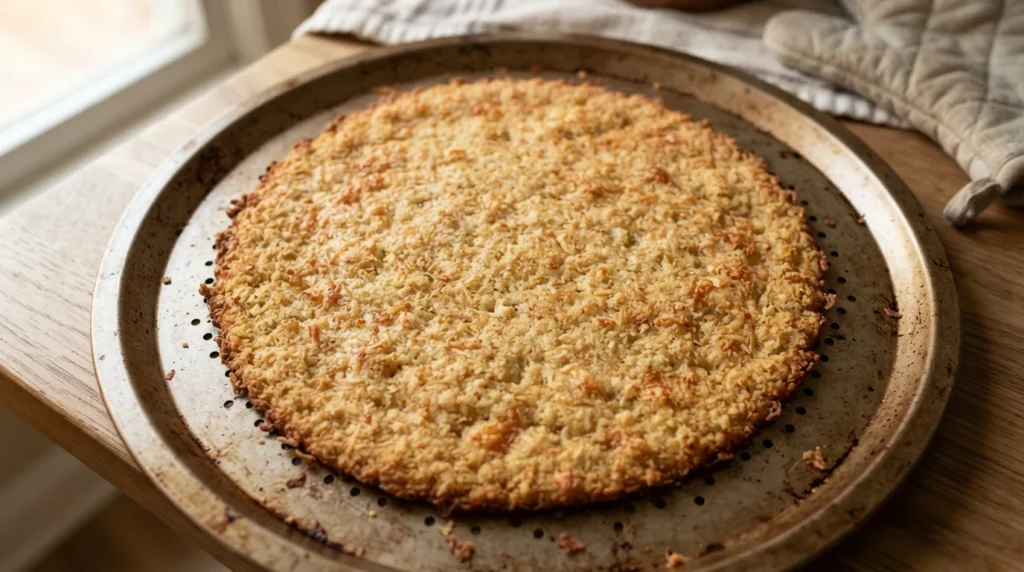

Many home cooks struggle to make keto cauliflower crust because it ends up soggier than the original or falls apart when topped. The secret lies in removing all excess moisture before mixing the ingredients. This guide provides a straightforward method for creating a dry, sturdy base that supports toppings without dripping.
Recipe Overview
This recipe yields approximately 8–10 slices of pizza crust. Preparation time is about 30 minutes, including cooking and cooling. The finished dough should be firm enough to roll out or press into a pan.
Yield and Timing
- Servings: 8–10 slices
- Total Time: 30 minutes (25 min active + 5 min cooling)
- Dough Resting: Optional 10 minutes for firmness
Ingredients
Measure ingredients precisely to ensure the right texture and carbohydrate content.
- Cauliflower florets: 1.5 kg (3 lbs 4 oz), raw, cut into bite-sized pieces
- Large egg: 1 unit, room temperature
- Garlic powder: 2 teaspoons
- Parmesan cheese: 50 g (approx. 1/4 cup), finely grated
- Mozzarella cheese: 100 g (approx. 3 oz), shredded low-moisture block
- Salt: 1/2 teaspoon
Method
- Prep the Cauliflower: Place the raw cauliflower florets in a large bowl. Steam them until they are very tender but not mushy, about 8–10 minutes over high heat. Alternatively, microwave on high for 5 minutes, then flip and cook another 3 minutes.
- Remove Moisture: Drain the cauliflower thoroughly in a colander. Transfer it to a clean kitchen towel or cheesecloth. Squeeze firmly with your hands until no liquid drips out. Repeat if necessary until the mass feels dry and crumbly. This step is critical; wet dough will not hold toppings.
- Mix Ingredients: In a large bowl, combine the squeezed cauliflower, egg, garlic powder, parmesan, mozzarella, and salt. Mix gently with your hands until everything is evenly distributed.
- Form the Base: Press the mixture into an 18-inch (46 cm) round pizza pan or dough sheet. Aim for a thickness of about 1/2 inch (1.2 cm). If using a pan, press firmly to eliminate air pockets.
- Cook the Crust: Bake at 400°F (200°C) for 15–20 minutes until the edges are golden and firm. Do not overbake or the cheese may separate.
- Cool and Serve: Remove from the oven and let cool for 5 minutes before adding toppings. This helps the crust set.
Troubleshooting Common Issues
If your crust is still too soft or leaks sauce, the moisture removal step was likely insufficient. Ensure you squeeze the cauliflower until it feels dry to the touch. If the dough crumbles too much while shaping, add a small amount of grated parmesan (10–15 g) to bind it.
Another common failure is a soggy base. This often happens if toppings are added before the crust has cooled slightly or if wet ingredients like fresh tomatoes are used without draining them first. Always drain any juices from sauces or fresh vegetables before assembling.
Substitution Options
If you prefer to avoid steaming, you can roast the cauliflower at 400°F (200°C) for 25–30 minutes until tender. However, roasting may leave slightly more moisture than steaming, so squeeze it even longer.
For a higher-protein version, increase the mozzarella to 150 g and add an extra egg yolk. Note that this increases fat content but keeps carbohydrates low.
Storage and Reheating
Store leftover crust in an airtight container for up to 3 days in the refrigerator. Freeze individual slices wrapped tightly for up to 1 month. To reheat, bake at 375°F (190°C) for 10–12 minutes or until heated through.
Frequently Asked Questions
Can I make this without steaming? Yes, roasting works, but you may need to squeeze the cauliflower longer to remove moisture.
Will this crust work for all pizza toppings? It works best with heavier toppings like pepperoni and cheese. Very wet toppings should be drained first.
How do I know if the cauliflower is dry enough? The mixture should feel crumbly when you touch it, not sticky or wet.