
Description
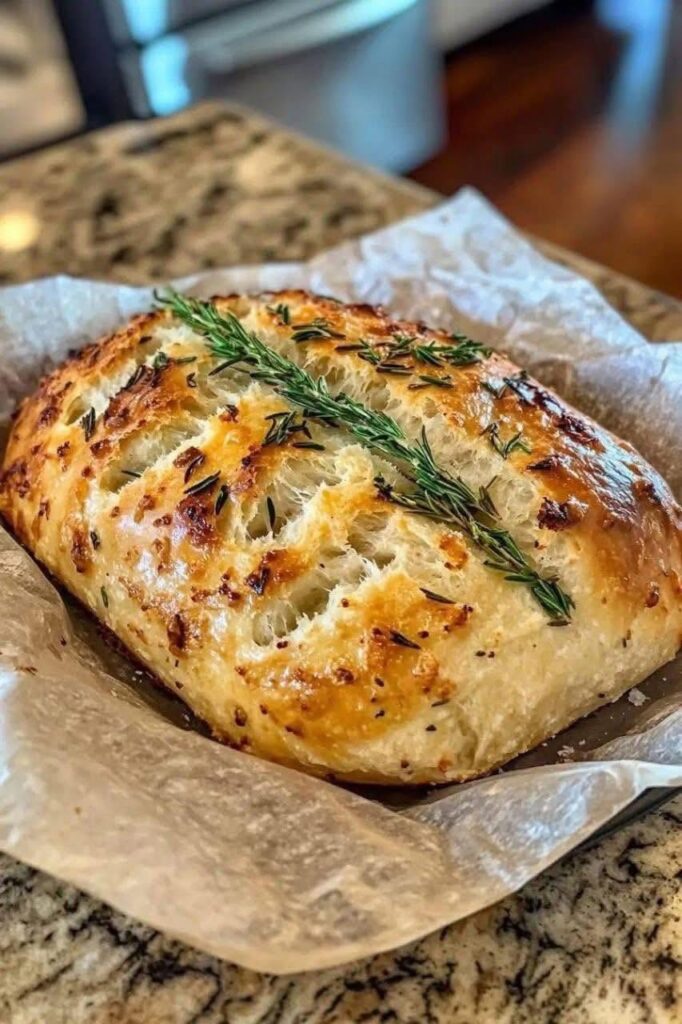
This No Knead Bread is a rustic, bakery-style loaf with a golden, crackly crust and a soft, airy interior—all made with minimal effort. No kneading, no complicated techniques, just simple ingredients and time doing the work for you.
As it slowly ferments, the dough develops deep flavor and a light, chewy texture that tastes like it came straight from an artisan bakery. Perfect for beginners and experienced bakers alike, this recipe is comforting, rewarding, and incredibly easy to master.
Naturally versatile, it pairs beautifully with soups, sandwiches, or breakfast spreads, making it a staple recipe for everyday cooking.
Short Description
Crusty artisan no knead bread with soft airy crumb.
Simple, beginner-friendly homemade bread recipe.
Perfect for sandwiches, soups, and everyday meals.
Can This No Knead Bread Support Weight Loss Goals?
Yes, in moderation it can fit into a balanced eating plan. While bread is carbohydrate-rich, this homemade version allows control over ingredients and portion sizes. When paired with protein-rich foods like eggs, chicken, or healthy fats, it becomes part of a more satisfying and balanced meal.
Does No Knead Bread Fit a High-Protein Lifestyle?
On its own, no knead bread is not high in protein, but it pairs very well with high-protein foods. It can be served with eggs, lean meats, tuna, or cheese to create a balanced meal. You can also increase protein slightly by using high-protein flour blends or adding seeds.
Why This Recipe is Special
- No kneading required—very beginner-friendly.
- Bakery-style crust with minimal effort.
- Long fermentation improves flavor naturally.
- Uses simple pantry ingredients.
- Perfect base for sandwiches and toast.
My Personal Experience
- Time does all the work here.
The dough develops structure without kneading. - The crust is incredibly satisfying.
It turns golden and crisp in the oven. - Preheating the pot is key.
It creates that signature artisan texture. - The dough is very forgiving.
Small mistakes don’t ruin the bread. - It tastes better after resting.
The flavor deepens as it cools.
Perfect For
This bread is perfect for beginner bakers, homemade sandwich lovers, soup pairings, weekend baking projects, budget-friendly cooking, comfort food meals, and everyday family use.
Why You’ll Love This Recipe
- No kneading required.
Effortless baking method. - Crusty artisan texture.
Bakery-quality at home. - Simple ingredients.
Flour, water, salt, yeast only. - Beginner-friendly.
Hard to mess up. - Versatile use.
Toast, sandwiches, or dipping bread.
Common Mistakes to Avoid
- Not allowing enough rising time for proper fermentation.
- Using too much flour, making bread dense.
- Skipping preheating of Dutch oven or baking pot.
- Cutting bread too early before it cools.
Required Equipment
- Large mixing bowl — For dough fermentation.
- Dutch oven or heavy pot with lid — Creates steam for crust.
- Wooden spoon — For mixing dough.
- Kitchen towel or plastic wrap — To cover dough while rising.
- Oven — For baking.
Storage Instructions
Room Temperature
Store in a paper bag or bread box for up to 2–3 days.
Refrigerator
Not recommended, as it can dry out the bread.
Freezer
Freeze slices or whole loaf for up to 2 months.
Reheating
- Oven: 5–10 minutes at 180°C for fresh crust
- Toaster: for slices
- Microwave: 10–15 seconds (softer texture)
Recipe Details
Preparation Time: 10 minutes
Resting Time: 12–18 hours
Cooking Time: 45–50 minutes
Total Time: 13–19 hours
Servings: 10 slices
Best Season for This Recipe: All-Season
Total Calories (Per Slice): Approximately 140 calories
📝 Ingredients
- 3 cups all-purpose flour (or bread flour for better structure)
- 1½ teaspoons salt
- ½ teaspoon instant yeast
- 1½ cups warm water
- Optional: 1 tablespoon olive oil (for softer crumb)
Optional Add-Ins
- Rosemary or herbs
- Garlic powder
- Seeds (sesame, flax, chia)
- Whole wheat flour (replace up to 50%)
Directions
1. Mix Dough
- Combine flour, salt, and yeast in a large bowl.
- Add warm water and mix until shaggy dough forms.
- Texture Cue: Sticky, rough dough.
2. First Rise
- Cover and let rest for 12–18 hours at room temperature.
- Visual Cue: Dough doubles and bubbles form.
3. Shape Dough
- Lightly flour surface and shape into a round loaf.
- Do not overwork the dough.
- Texture Cue: Soft, airy dough.
4. Preheat Oven
- Preheat oven to 230°C (450°F) with Dutch oven inside for 30 minutes.
- Heat Level: Very hot for crust formation.
5. Bake Covered
- Place dough into hot pot and cover.
- Bake for 30 minutes.
- Visual Cue: Steam builds inside for soft interior.
6. Bake Uncovered
- Remove lid and bake 15–20 minutes more.
- Texture Cue: Golden brown crust.
7. Cool
- Let bread cool completely before slicing.
High-Protein Cooking Tips
- Pair with eggs, tuna, or chicken for balanced meals.
- Add seeds like chia or flax for slight protein boost.
- Use whole wheat flour for higher nutrient density.
- Serve with Greek yogurt spreads for protein-rich topping.
Nutrition Facts (Per Slice – Approximate)
| Nutrient | Amount |
|---|---|
| Calories | 140 |
| Fats | 1g |
| Cholesterol | 0mg |
| Sodium | 180mg |
| Potassium | 40mg |
| Total Carbohydrates | 28g |
| Fiber | 1g |
| Net Carbs | 27g |
| Sugars | 0g |
| Protein | 4g |
| Calcium | 10mg |
Notes
- Dough should be sticky, not dry.
- Long fermentation improves flavor.
- Always preheat baking vessel.
- Let bread cool before slicing to avoid gumminess.
- Can be customized with herbs or seeds.
- Best eaten fresh but freezes well.
- Great base for savory or sweet toppings.
Frequently Asked Questions
1. Why is my bread dense?
It may not have risen long enough or had too much flour.
2. Can I use active dry yeast?
Yes, just activate it in warm water first.
3. Do I need a Dutch oven?
It helps create steam and a better crust but can be substituted.
4. Can I make it whole wheat?
Yes, replace up to 50% of flour.
5. Why is my crust too hard?
It may have overbaked or cooled too quickly uncovered.
6. Can I speed up the process?
No, long fermentation is key for flavor and texture.